
I needed a LEGO mechanism that could turn ON or OFF an electrical circuit using an independent power source. This power source could be a regular LEGO battery but could also be a different type. So a LEGO relay.
I remember seeing somewhere a few LEGO mechanisms with the same purpose, like moving the slider of a Power Functions battery box or rotating an axle inside of a Power Function switch… but could not find them.
So this is my own implementation.
I used a Power Functions switch. We can mechanical control the switch with a Technic axle inserted in two different ways – over the top or through it:

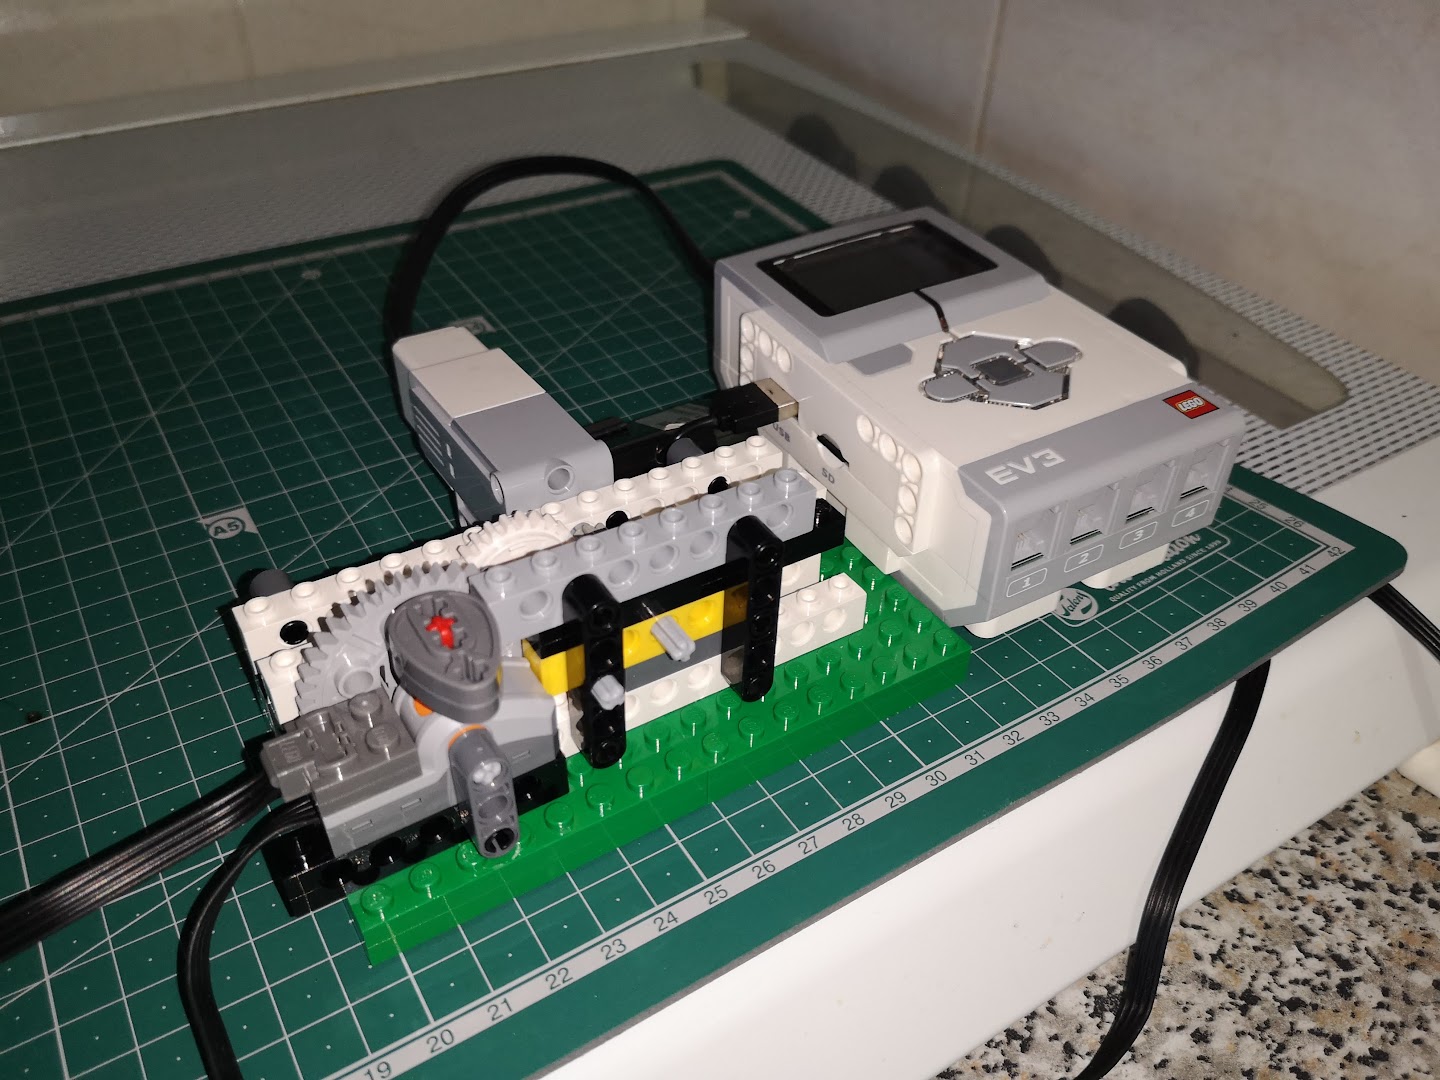
I decided to insert the axle through it. As the idea is using a MINDSTORMS to control the relay, I could have connected the axle directly to a motor and control the time or the angle. But I started with a Power Functions motor connected to a Power Functions battery and since the motor is too strong and fast I used a clutch gear to protect the switch when extreme position is reached.
The switch has 3 working positions where the neutral (middle) is the OFF position and both left and right extremes are ON both with opposite polarities. As I just wanted ON and OFF I needed to limit the motion to just half.
Perhaps not most the efficient mechanism or beautiful design but this works:

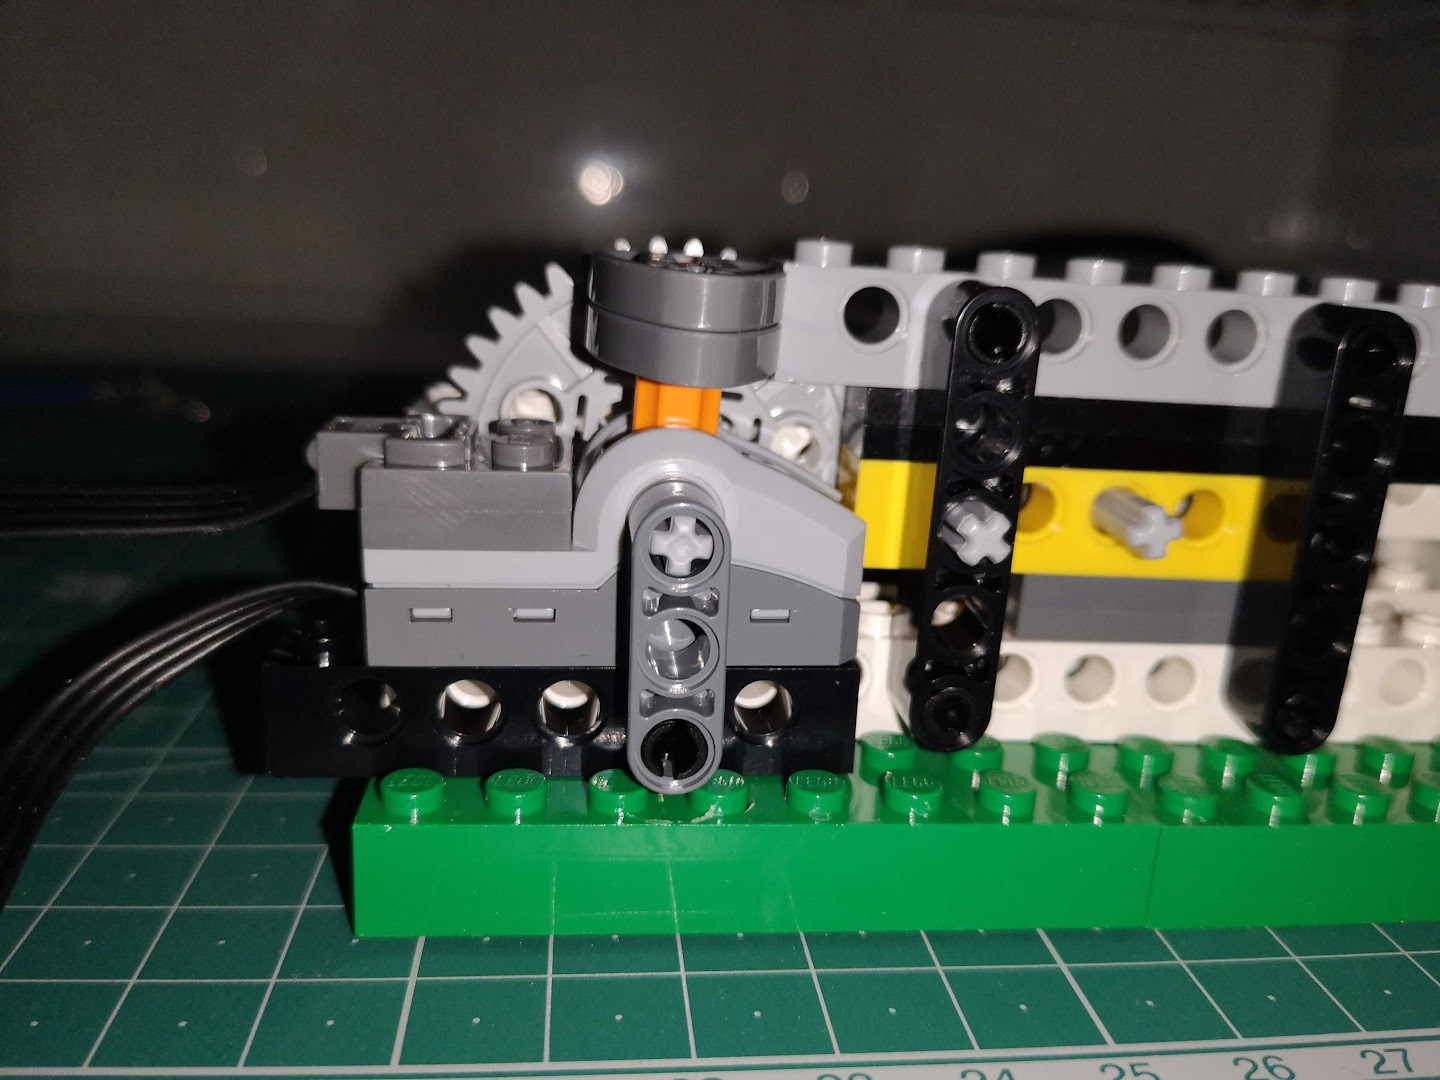
The cam gears were the first piece I found with the proper size – when the switch is off the cam gears touch the Technic grey brick so if the motor keeps rotating the clutch gear will slip and protect the switch axle.
The relay works with power Functions cables so regular LEGO batteries and devices can be used. But I used a 2.1 mm female jack with a pair of crocodile cables to connect an old LEGO electric plate to a 12V/1.5A wall power supply and a custom Power Functions cable with male headers soldered to it to connect to a kanthal wire.
I prefer to use kanthal wire instead of nichrome wire for several reasons: it has a higher electrical resistence and also a higher melting temperature… and it is also widely available now that vaping is a trend (I don’t smoke but could not find a single nichrome supplier here in Portugal but have several online vaping stores selling dozens of variants of kanthal wires). Metal strings used with guitars also work and are easy to find but electrical resistance is too low.
So I used a 20 cm piece of kanthal wire to make a coil with perhaps a dozen turns and test it several times:

Then connected the coil endpoints to 2 crimp pins and soldered it to the custom Power Functions wire (it’s not easy to solder kanthal wire so crimping is a better option)
And now I have a MINDSTORMS controlled ignitor. Great for hobby rockets or party candles:
Remember: don’t try to do this if you don’t fully understand it. Also keep in mind that although party sparkles aren’t dangerous per se igniting one near flammable products can start a fire. Always take safety measures.
Edit:
And the bash script for the sparkle ignitor’s video (ev3dev):
#!/usr/bin/env bash

MTRTIME=1000   # 1 second
MTRSPEEDON=-650
MTRSPEEDOFF=650
PAUSE=1 # MTRTIME / 1000

IGNITION=10 # ignition time in seconds

function Init {
    echo "Start"
    echo $MTRTIME > /sys/class/tacho-motor/motor0/time_sp
}

function SwitchON {
    echo $MTRSPEEDON > /sys/class/tacho-motor/motor0/speed_sp
    echo run-timed > /sys/class/tacho-motor/motor0/command
    sleep $PAUSE
}

function SwitchOFF {
    echo $MTRSPEEDOFF > /sys/class/tacho-motor/motor0/speed_sp
    echo run-timed > /sys/class/tacho-motor/motor0/command
    sleep $PAUSE
}

function SpeakCountdown {
    espeak -a 200 -g 12 -p 70 "Ten"
    espeak -a 200 -g 12 -p 70 "Nine"
    espeak -a 200 -g 12 -p 70 "Eight"
    espeak -a 200 -g 12 -p 70 "Seven"
    espeak -a 200 -g 12 -p 70 "Six"
    espeak -a 200 -g 12 -p 70 "Five"
    espeak -a 200 -g 12 -p 70 "Four"
    espeak -a 200 -g 12 -p 70 "Three"
    espeak -a 200 -g 12 -p 70 "Two"
    espeak -a 200 -g 12 -p 70 "One"
    espeak -a 200 -g 12 -p 70 "Zero"
}

function SpeakHB {
    espeak -a 200 -g 12 -p 70  "Happy birthday!"
}

function finish {
    SwitchOFF
    echo reset > /sys/class/tacho-motor/motor0/command
    echo "End"
}

trap finish EXIT

Init
SwitchOFF
SpeakCountdown
SwitchON
sleep $IGNITION
SpeakHB
SwitchOFF