Triplex v0.4

This post is part 2 of 3 of  Triplex

Triplex v0.3 was demoed at São João da Madeira’s BRInCKa 2017, just using remote control from my laptop through a ssh session. As expected, some people find it similar to a lobster and a few visitors noticed the omniwheels and asked for further details.

The best moment was after the exhibition being closed – a private test drive session just for ‘Pocas’, our LUG mosaic expert:

One of these days I do have to complete my wifi-to-IR gateway so Pocas can drive Technic Power Functions models like the 42065 RC Tracked Racer.

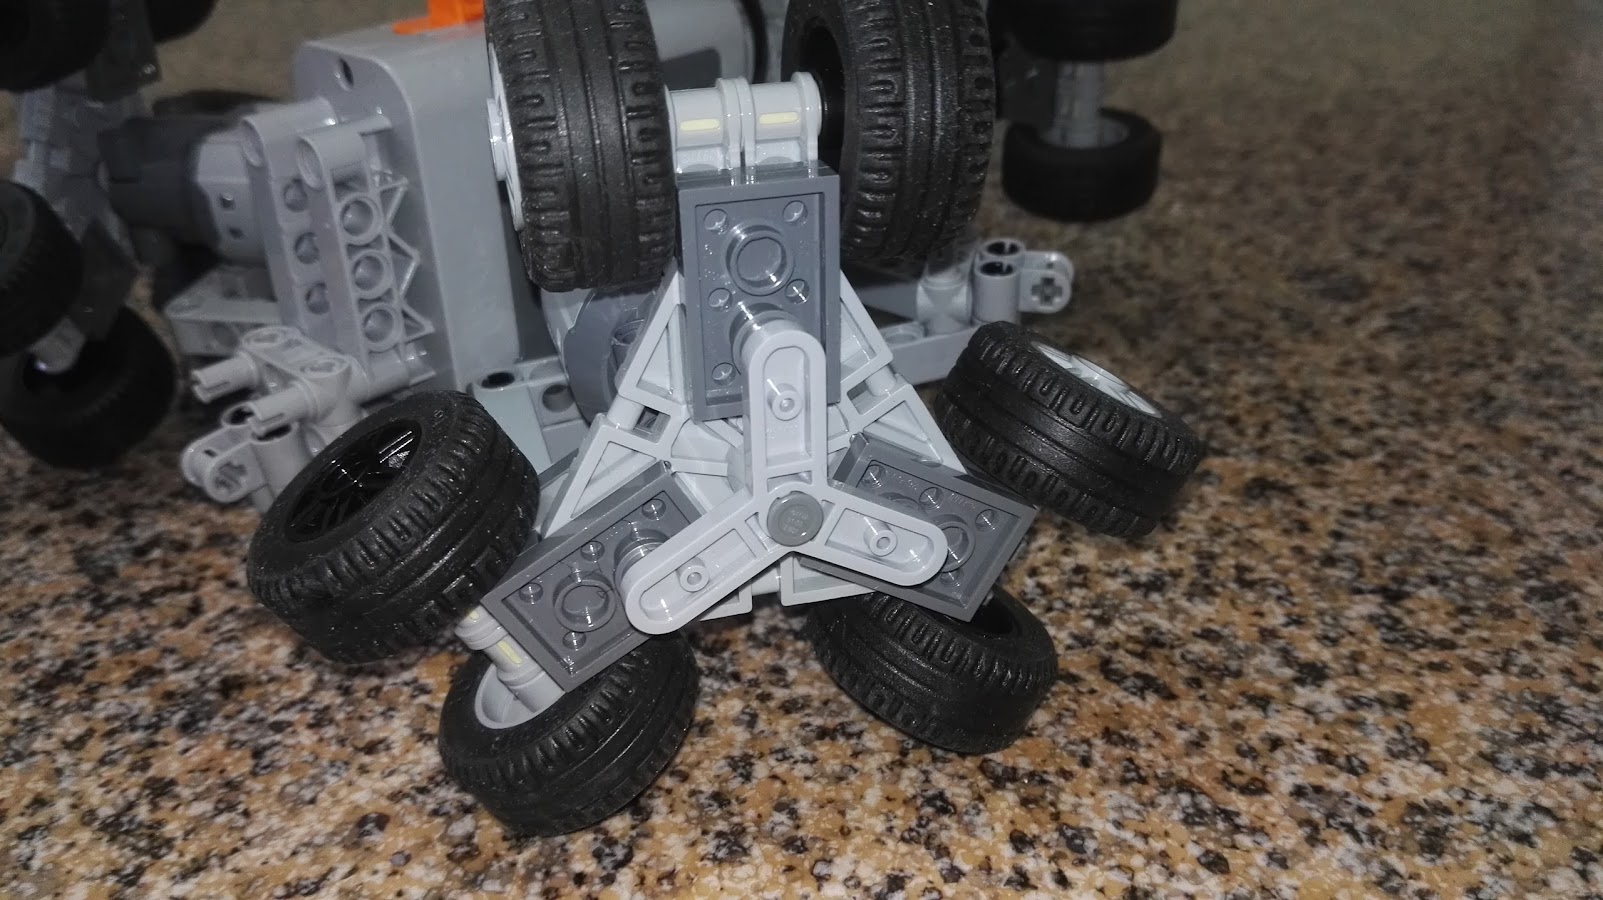
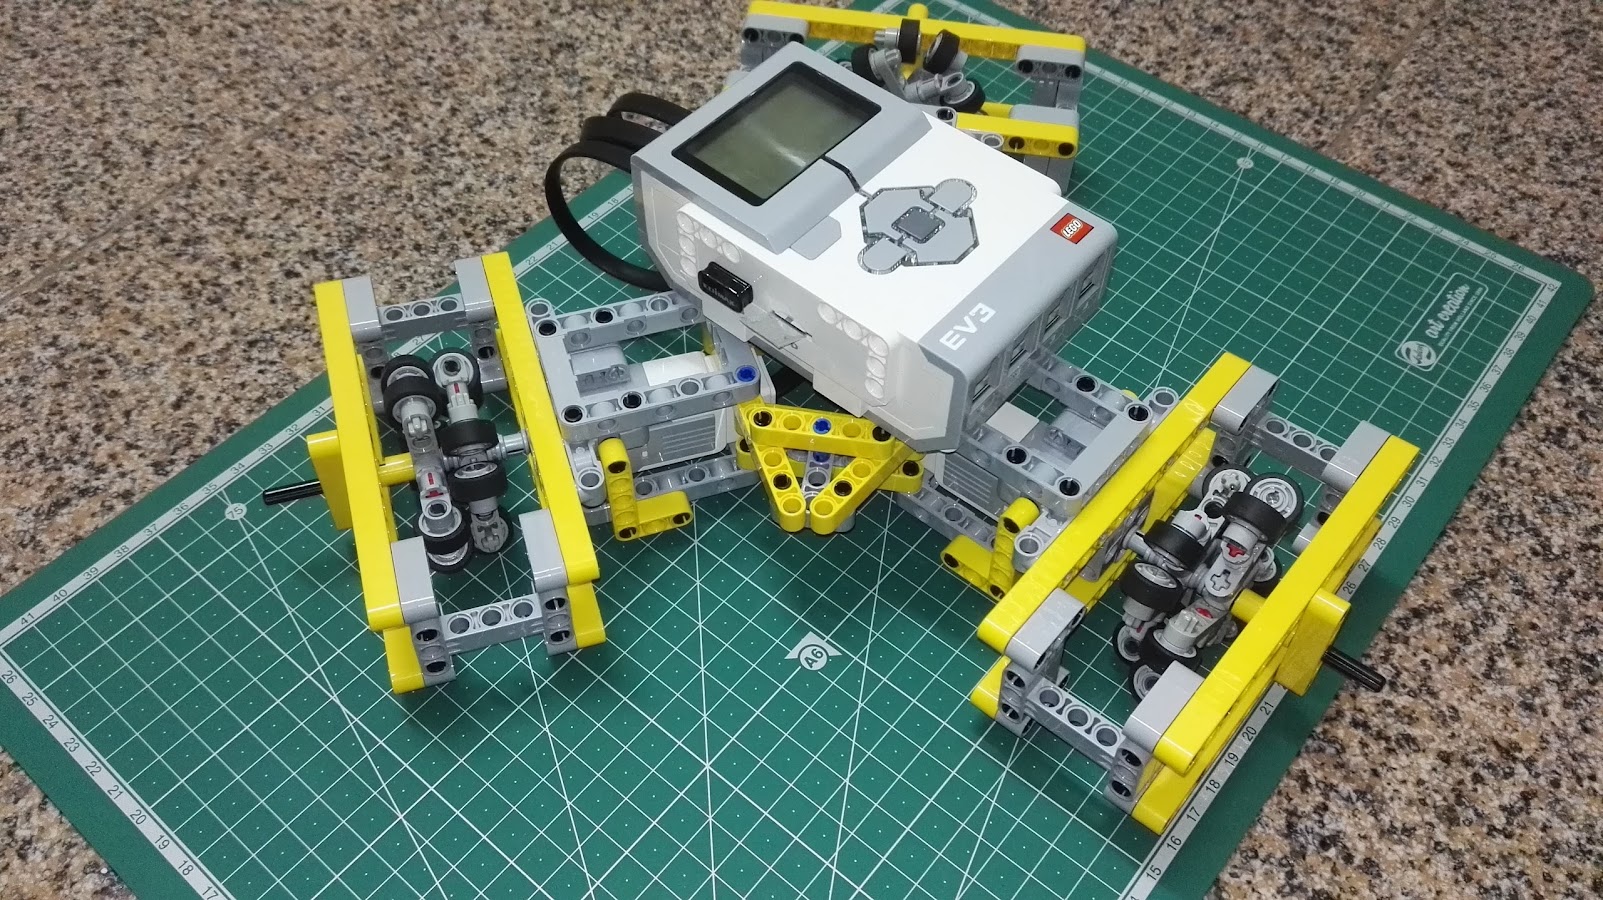
Now one of the lessons learned at BRINcKa 2017 was that Triplex was bending with is own weight. So last weeked I redesigned it to be more solid. Version 0.4 “legs” are now a little longer and overall I think it looks more elegant:

Also managed to make the math working and tested my matrix in python:

 0.667      0        0.333
-0.333    -0.575     0.333 
-0.333     0.575     0.333

To test moving it in 24 different directions (multiples of 15º) I used this python script (with some simplifications – since I don’t want it to rotate)

#!/usr/bin/env python3
from math import cos,sin
from time import sleep
import ev3dev.ev3 as ev3

M11 = 0.667
M12 = 0
M13 = 0.333
M21 = -0.333
M22 = -0.575
M23 = 0.333 
M31 = -0.333
M32 = 0.575
M33 = 0.333

SPEED = 1000
TIME = 1200
PAUSE = 0.8
PI = 3.14159

m1 = ev3.MediumMotor('outA')
m2 = ev3.MediumMotor('outB')
m3 = ev3.MediumMotor('outC')

# select an angle a in PI/12 radians = 15º

for x in range(0, 24):

# move
    a = x*PI/12
    ax = cos(a)
    ay = sin(a)

    f1 = M11 * ax + M12 * ay
    f2 = M21 * ax + M22 * ay
    f3 = M31 * ax + M32 * ay

    s1 = f1 * SPEED
    s2 = f2 * SPEED
    s3 = f3 * SPEED

    m1.run_timed(time_sp=TIME, speed_sp=s1)
    m2.run_timed(time_sp=TIME, speed_sp=s2)
    m3.run_timed(time_sp=TIME, speed_sp=s3)

    sleep(TIME/1000)
    sleep(PAUSE)

# move back
    a = PI + x*PI/12
    ax = cos(a)
    ay = sin(a)

    f1 = M11 * ax + M12 * ay
    f2 = M21 * ax + M22 * ay
    f3 = M31 * ax + M32 * ay

    s1 = f1 * SPEED
    s2 = f2 * SPEED
    s3 = f3 * SPEED

    m1.run_timed(time_sp=TIME, speed_sp=s1)
    m2.run_timed(time_sp=TIME, speed_sp=s2)
    m3.run_timed(time_sp=TIME, speed_sp=s3)

    sleep(TIME/1000)
    sleep(PAUSE)

The result can be seen in this video:

The robot drifts a lot after the 48 moves and also rotates a bit. Will have to compensante it with a gyro (and probably better wheels, I’m considering mecanum wheels).  But the directions are quite as expected.

I uploaded a couple of photos to the Triplex Project Album. Will try to add a few more later on.

Triplex – an holonomic robot

This post is part 1 of 3 of  Triplex

A few months ago, trying to find an use for a new LEGO brick found in NEXO Knights sets, I made my first omni wheel. It worked but it was to fragile to be used in a robot so I decided to copy one of Isogawa’s omni wheels and keep working on an holonomic robot with 3 wheels.

Why 3 wheels?

At first I only had NEXO parts to build 3 wheels but I enjoyed the experience – my first RC experiments seemed like lobsters. Controlling the motion is not easy but I found a very good post from Miguel from The Technic Gear  so it was easy to derive my own equations. But Power Functions motors don’t allow precise control of speed so I could not make the robot move in some directions. I needed regulated motors like those used with MINDSTORMS EV3.

So after assembling three Isogawa’s omniwheels and making a frame that assured the wheel doesn’t separate from the motor it was just a matter of making a triangled frame to join all 3 motors and sustain the EV3:

First tests with regulated motor control seem promising: Triplex is fast enough and doesn’t fall apart.  It drifts a bit so I’ll probably use a gyro sensor or a compass to correct it.

In this demo video I show Triplex being wireless controlled from my laptop keyboard through an SSH session. It just walks “forward” or “backward” (only two motors are used, running at the same speed in opposite directions) or rotates “left” or “right” (all motors are used, running at the same speed and the same direction).

For the code used in this demo I copied a block of code from Nigel Ward’s EV3 Python site that solved a problem I’ve been having for a long time: how do I use Python to read the keyboard without waiting for ENTER and without installing pygame or other complex/heavy library?

#!/usr/bin/env python3

# shameless based on
# https://sites.google.com/site/ev3python/learn_ev3_python/keyboard-control
#

import termios, tty, sys
from ev3dev.ev3 import *

TIME_ON = 250

motor_A = MediumMotor('outA')
motor_B = MediumMotor('outB')
motor_C = MediumMotor('outC')

#==============================================

def getch():
    fd = sys.stdin.fileno()
    old_settings = termios.tcgetattr(fd)
    tty.setcbreak(fd)
    ch = sys.stdin.read(1)
    termios.tcsetattr(fd, termios.TCSADRAIN, old_settings)
    
    return ch

#==============================================

def forward():
    motor_A.run_timed(speed_sp=-1200, time_sp=TIME_ON)
    motor_C.run_timed(speed_sp=1200, time_sp=TIME_ON)

#==============================================

def backward():
    motor_A.run_timed(speed_sp=1200, time_sp=TIME_ON)
    motor_C.run_timed(speed_sp=-1200, time_sp=TIME_ON)

#==============================================

def turn_left():
    motor_A.run_timed(speed_sp=1200, time_sp=TIME_ON)
    motor_B.run_timed(speed_sp=1200, time_sp=TIME_ON)
    motor_C.run_timed(speed_sp=1200, time_sp=TIME_ON)

#==============================================

def turn_right():
    motor_A.run_timed(speed_sp=-1200, time_sp=TIME_ON)
    motor_B.run_timed(speed_sp=-1200, time_sp=TIME_ON)
    motor_C.run_timed(speed_sp=-1200, time_sp=TIME_ON)

#==============================================

print("Running")
while True:
   k = getch()
   print(k)
   if k == 'a':
      forward()
   if k == 'z':
      backward()
   if k == 'o':
      turn_left()
   if k == 'p':
      turn_right()
   if k == ' ':
      stop()
   if k == 'q':
      exit()

Thanks for sharing Nigel!

Now let’s learn a bit of math with Python.

For those who might interest, I also have some photos with the evolution of the project.