Wireless charger for MINDSTORMS EV3

This post is part 1 of 4 of  Wireless charger

A few months ago I was discussing with Juan about his ideas for a charging station for mobile robots. He was already creating several prototypes but I remember suggesting a wireless circuit, an idea that kept bumping inside my mind until a few weeks ago when I found a very cheap (less than €2,5) Qi receiver at bangood:
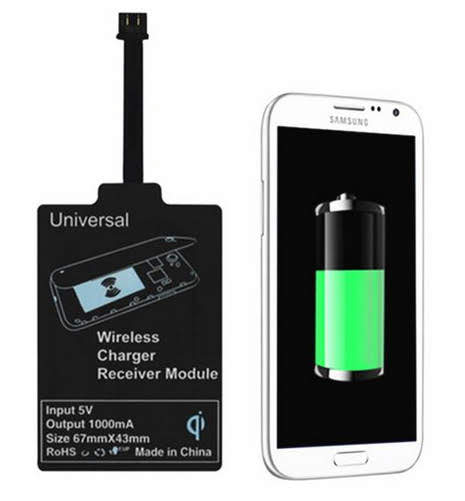
Qi receivers for mobile phones supply only 5V through the USB plug but we can use a boost circuit to raise the voltage. This circuit advertises an output current of 1A, if true (we never know, do we?) doubling the voltage to 10 Volt would reduce the output current to 500 mA with an ideal boost circuit. There are no ideal circuits but at least 400 mA is expected, not great but enough to charge a LEGO robot so lets try…

The remain parts are simple:

Any breakout board is fine as long as it exposes the GND and 5V pins, I got one at a local store for less than €2

There are other models, even cheaper, but I also got this one from a local store and it works good: 2 input pins, 2 output pins and an adjustment potentiometer, that’s it!

– a power plug compatible with LEGO EV3 battery

I cannot suggest a proper plug because I’m not 100% sure of the size… I think it is a 1.7 mm jack like this from Amazon:

I simply cut a plug from a cheap wall charger I had around (not the LEGO one! :D)  so I didn’t even had to solder wires

– a couple of wires, preferably red and black

That’s it!

Assembling is very easy so I’m not even goig to draw a circuit:

  1. solder 2 wires to the microUSB breakout board +5V volt (or VBUS) and GND pins
  2. solder the other end of those 2 wires to the input pins of the boost circuit (GND to IN- and +5V/VBUS to IN+)
  3. solder other 2 wires to the output pins of the boost circuit (OUT+ and OUT-)
  4. solder the other end of thos 2 wires to the jack (OUT- to the outter metal part, OUT+ to the inner part)

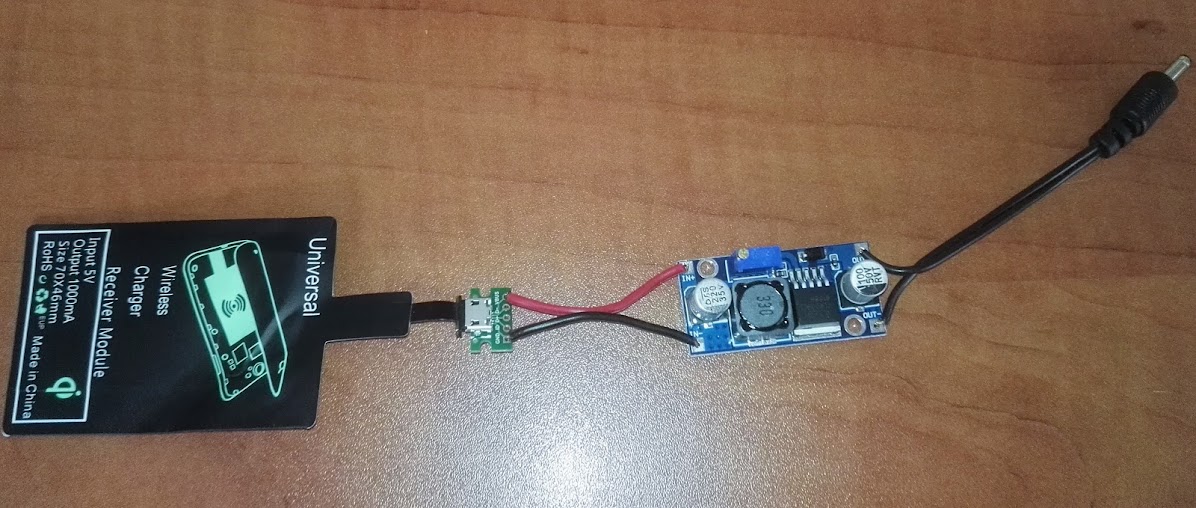
Here a picture with all soldered:
Then you need a voltmeter to adjust the output voltage. Put the Qi receiver over a Qi emitter and assure it’s coupled (most of them give some kind of visual indication of the coupling state like a blue LED) and trim the potentiometer with a small screwdriver until you got 10.0 Volt (you can use higher or lower values but higher will mean less current available so more time to charge and lower might not be enough for the internal circuits of the EV3 battery to work properly).

In this video you can see the green LED of the EV3 battery blinking – that’s part because the Qi receiver wasn’t properly aligned with the Qi emitter,  part because both Qi components are low-end quality (the emitter is from a friend, it was a gift at an HP event) and finally part because the Qi emitter was being powered up from my laptop – after switching to a 3.1A wall adapter USB charger I got better performance, even a few millimeters of spacing.
Stage Lighting

This post is part 3 of 5 of  LEGO Rock Concert

So the stage size is settled, it will use 3×3 LEGO standard baseplates (32×32 studs each).

Now time to think about the lighting.

For the first version I wanted to be able to control each of the spotlights individually. To minimize wiring I decided to use a 1-wire bus (2 wires for power, 1 wire for data) and I found a 1-wire USB controller that worked very well with linux and (of course) with ev3dev.

I was very happy with the Ev3 1-wire network but not so happy with the way I wired it with my LEGO trusses. I tried to create a pluggable system that would allow me to easily extend the number of spots but never got a decent and discreet solution so I use only fixed size wires, soldered in a daisy-chain. It worked but “locked” my spotlights to the trusses permanently.

So for this new version I decided to use just one or two control channels and use common LEGO Power Function lights (well, at least for this year).

As for the trusses that support the spotlights I also decided to try non-Technic parts – I liked my previous design with only Technic parts but it was already noticeable that the spotlights were too heavy and the 32L axles were bending.

Since LEGO has a truss brick already, lets try it:

So 1 one channel is easy: each Power Functions Light assures 2 spotlights and I just need to daisy chain several of them. We can even make the lights blink with just a electro-mechanic controller like In this video:

Unfortunately it makes to0 much noise so I will have to use something purely electric.

Xutos’ 25th Anniversary concert was indoor (at ‘Pavilhão Atlântico’, currently named ‘Altisse Arena’) and the lights were suspended from the ceilling so there were no vertical trusses in front of the band. If I can’t  keep it realistic I can try a mix: keep the X-shaped stage used in that concert but use a dome truss similar to this model they used in several outdoor concerts in the last couple of years:

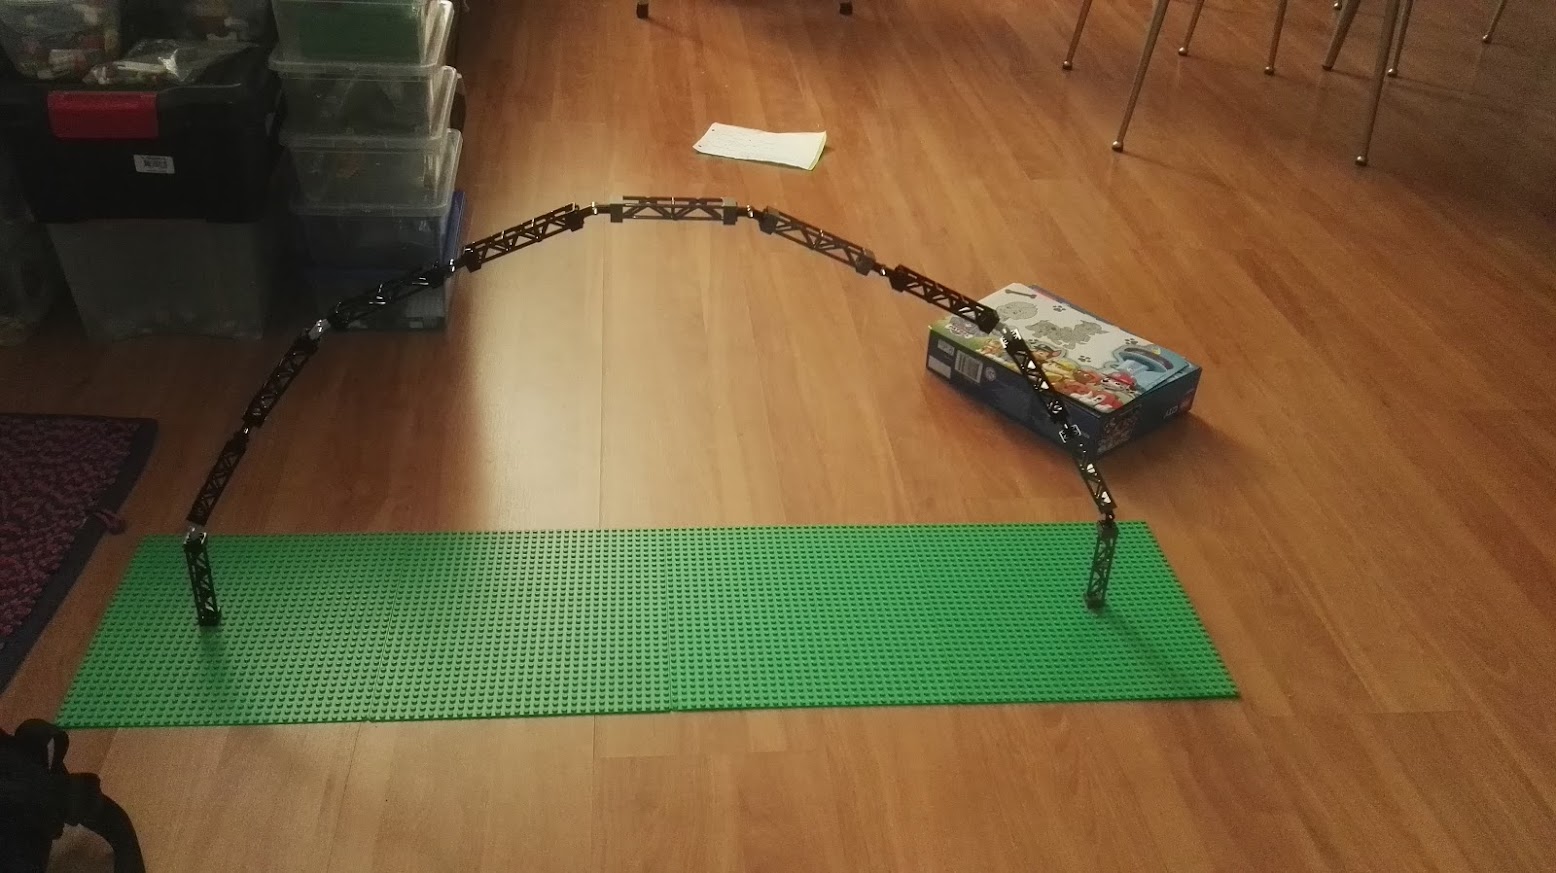
So I tried an arch with the LEGO trusses to see it stands hold:

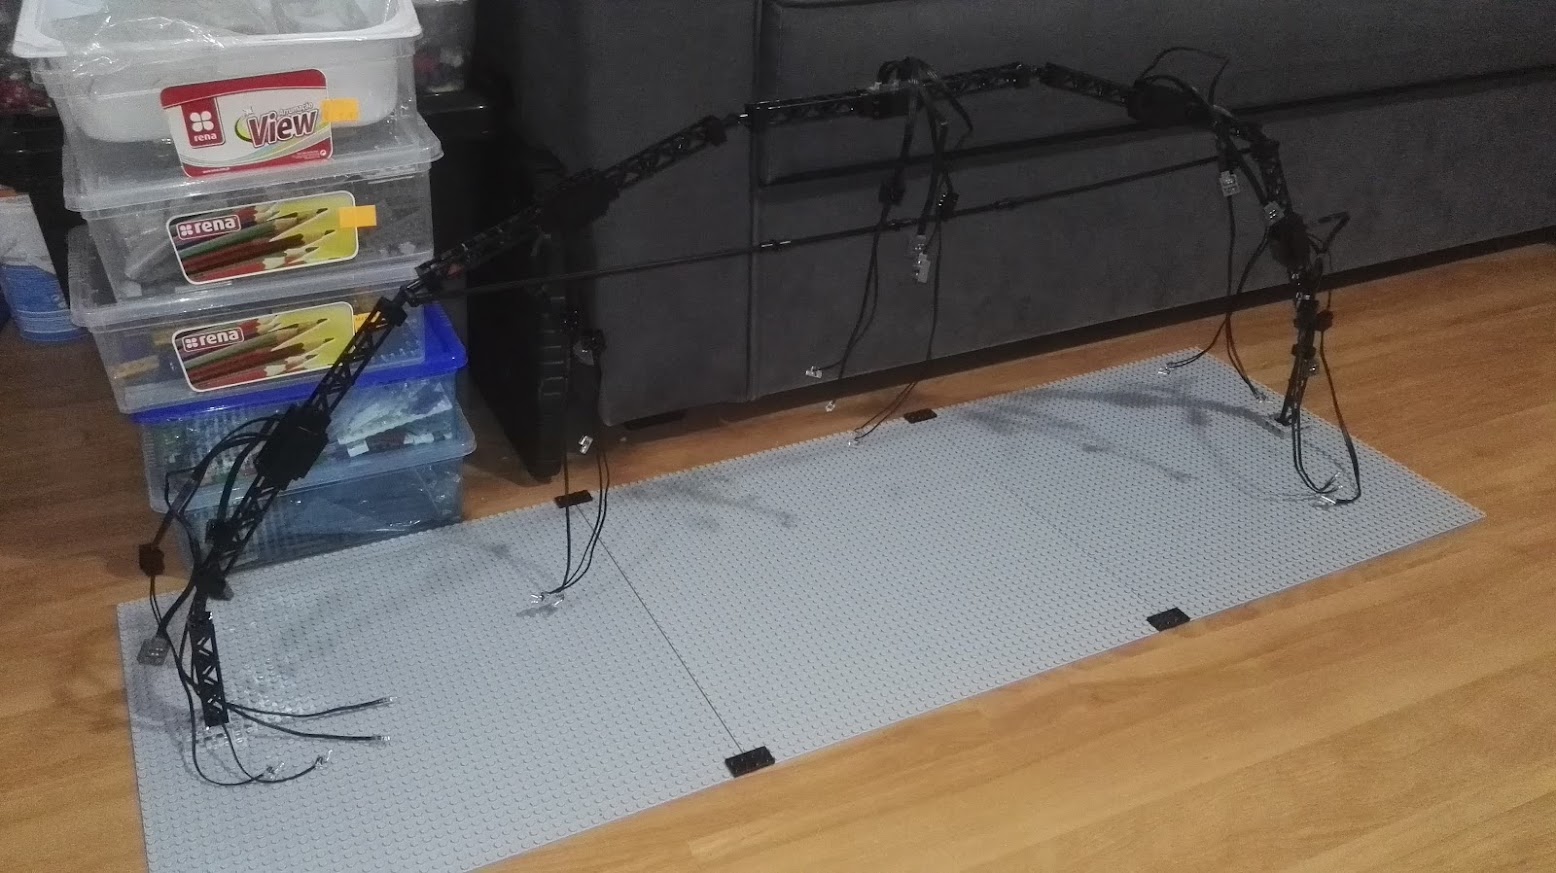
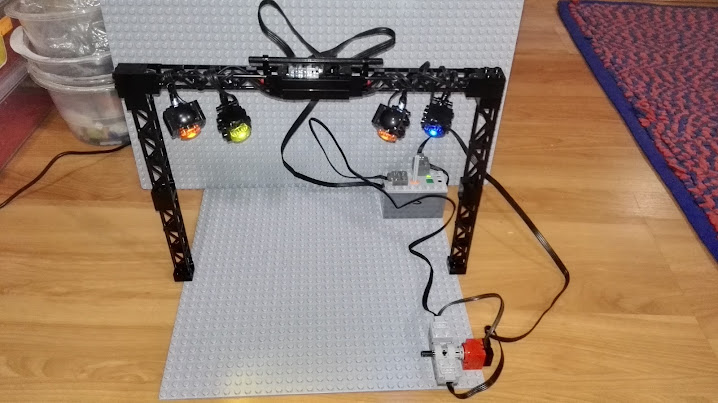
Then I added the Power Functions lights but since the weight was too much I had to redesign it a bit, ending with a much larger arc:

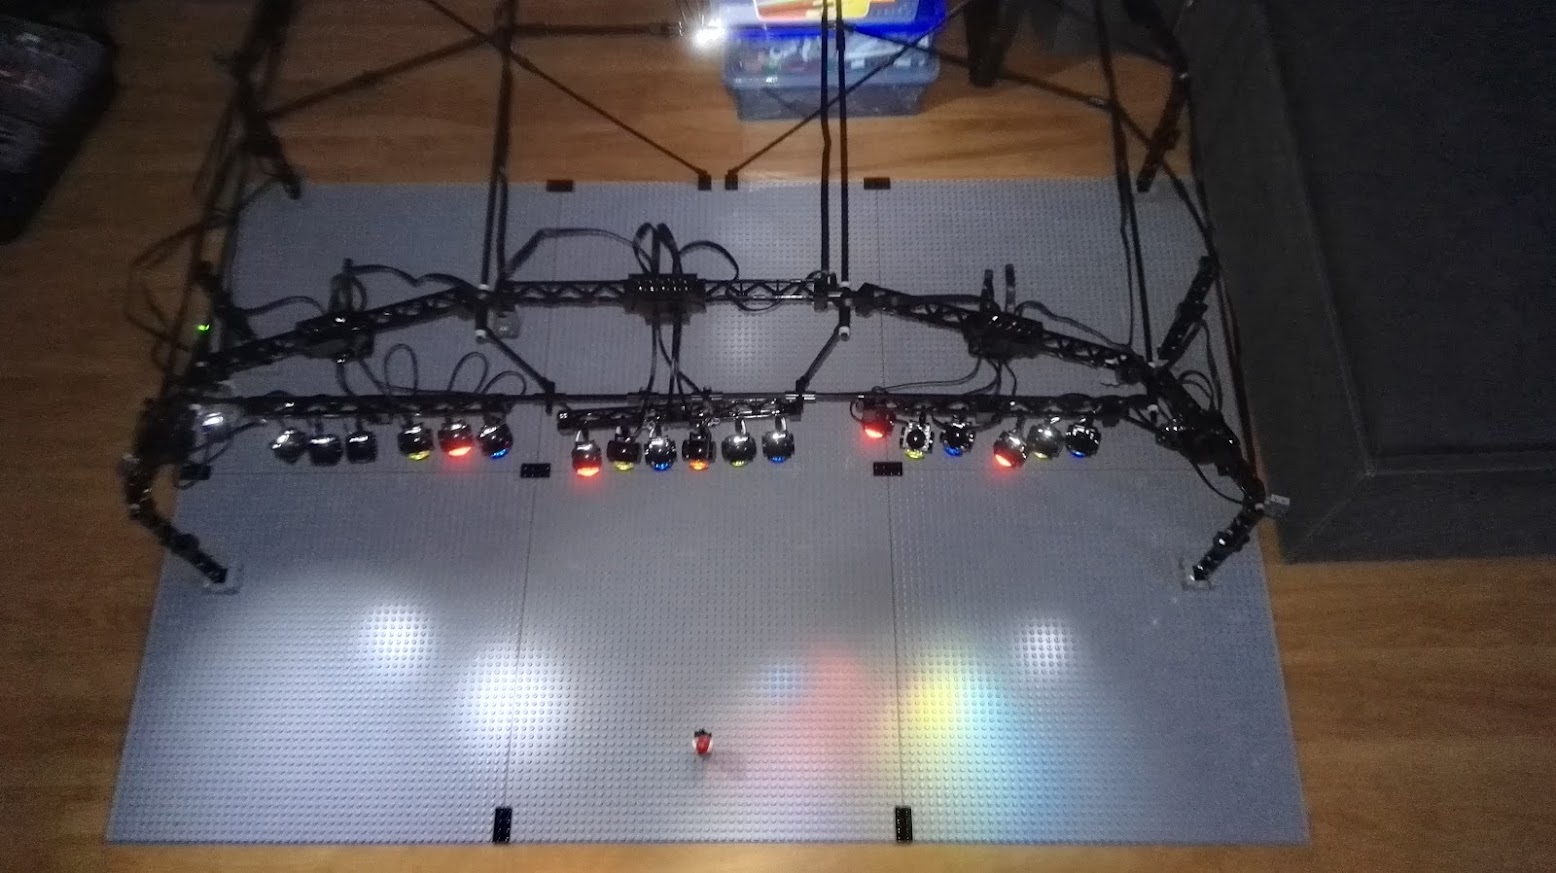
It holds ‘per se’ but is not stable at all, tending to fall to the front or to the back. So a second or even a third arc was needed and also had to raise it a bit because when wife saw it she said the lights were too low and that would prevent people to see the stage. And since wife is always right…

This has been holding tight in our leaving room for the last 7 days (and we have 2 kids!) so I’ll might just reinforce the middle connections of the trusses that have Power Functions cable extensions.

This is already a 2-channel system so I can control half of the spotlights at any time. So it’s a proper time to finally add a MINDSTORMS EV3 to the project… and since I already got six small battery-powered active speakers I can also play a music:


The stage

This post is part 2 of 5 of  LEGO Rock Concert

The main part of the Rock Concert is the stage so it will set the scale of all the diorama.

In the first version, the stage had a few internal gears that allow my kids to move the minifigures of 4 of the 5 elements of the band with a stick at the backstage. I had the idea to animate all 5 but never got a solid way to move the arms of the drum player (“Kalu”) so I left him static and put “Zé Pedro” walking along the stage with his guitar (he is/was a bit wild at stage, once he even broke a leg jumping to a speaker) and the remain three just turning around on their places (“Tim” the bass player and main vocals, “João Cabeleira” the human statue that plays guitar and “Gui” with his saxophone).

A second version had 4 LEGO mini-motors instead of sticks and a LEGO MINDSTORMS EV3 controlling the motors… through a USB 8-relay board! It was one of my first experiments with ev3dev and I had no idea how to control those old motors so I used the relay board I had bought for the Raspberry Pi… it was also the first time I invoked bash scripts from python:

This new version will probably have a similar setup (without relays) but for now I’m just concerned with settling the dimensions.

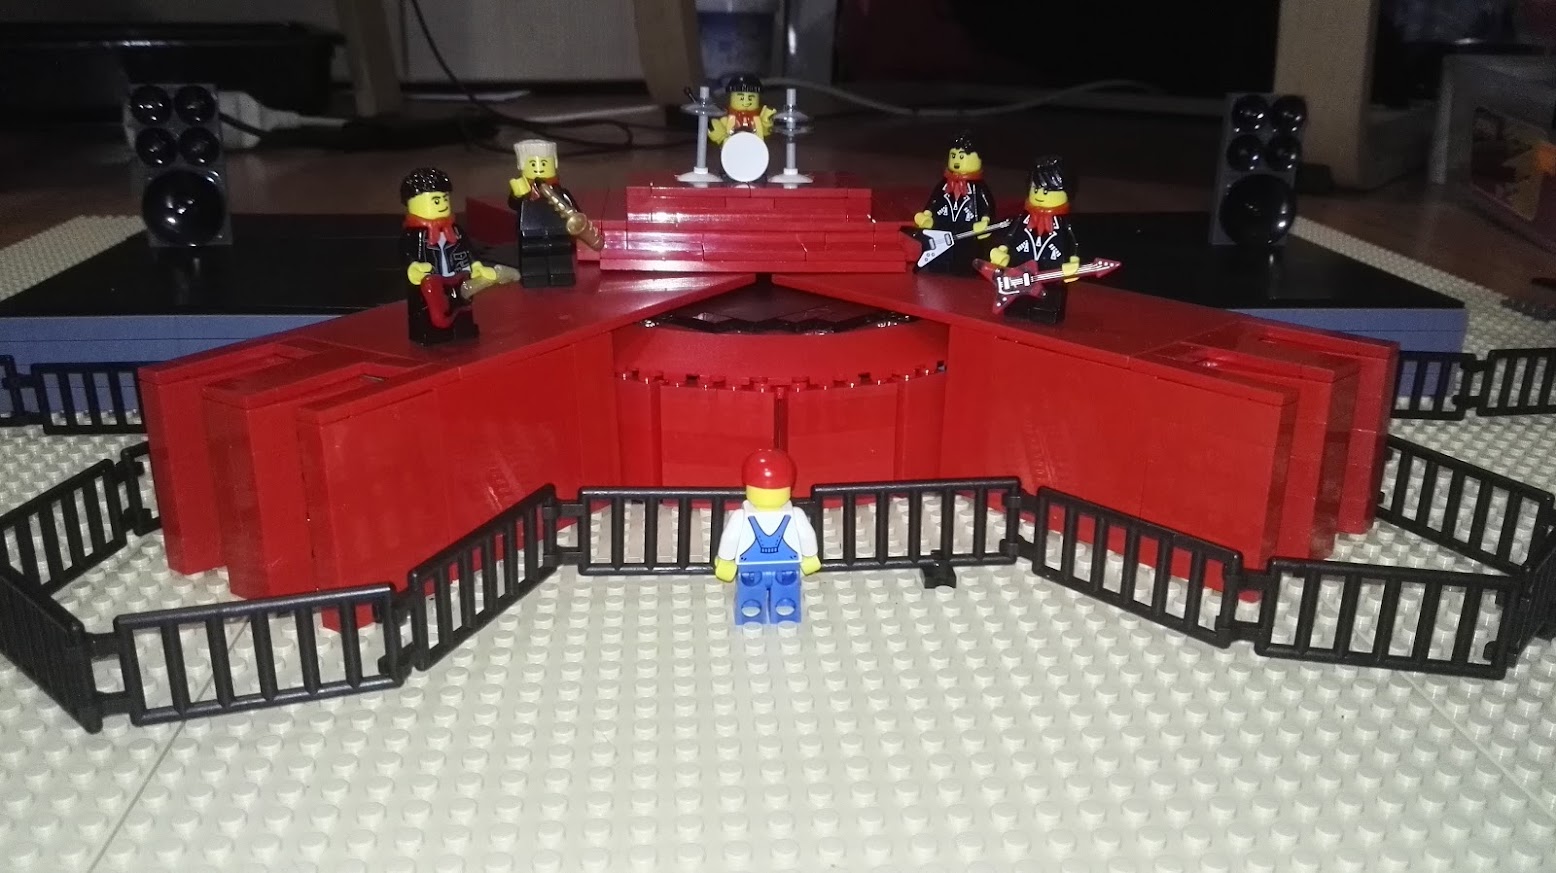
As I had big bunch of red tiles from a LEGO 10 kg box I decided to make the X-shaped stage:

Yeah, ugly but that’s a start. A few more pieces from Bricklink and things started to get better:

So a few more bricks from Bricklink and lots of funny-blue tiles from the same 10 kg box and the main part of the stage is done:

I’ll increase size a bit more to left/right but the ‘X’ will stay this size.

Height is also good because it will allow me to put small speakers inside and probably a few other things if/when I decide what special effects I will have on stage.

Work in progress: LEGO Rock Concert

This post is part 1 of 5 of  LEGO Rock Concert

Got myself an anti-stress project: rebuild my LEGO Xutos&Pontapés rock concert.

About 30 years ago my cousin took me with him for a rock concert in the town next by: Xutos&Pontapés. I was a kid with almost no interest in music but Xutos had recently released their third LP and finally got some country-wide success, everybody were singing their singles so… why not?

I got hooked! Xutos were a great live band and after all those years they still are.

So my late teenage years as also my first adult years were strongly influenced by their energy. At college I made the first related site (pew! ugly!) and when I got married my tie had their ‘X’ stamped.

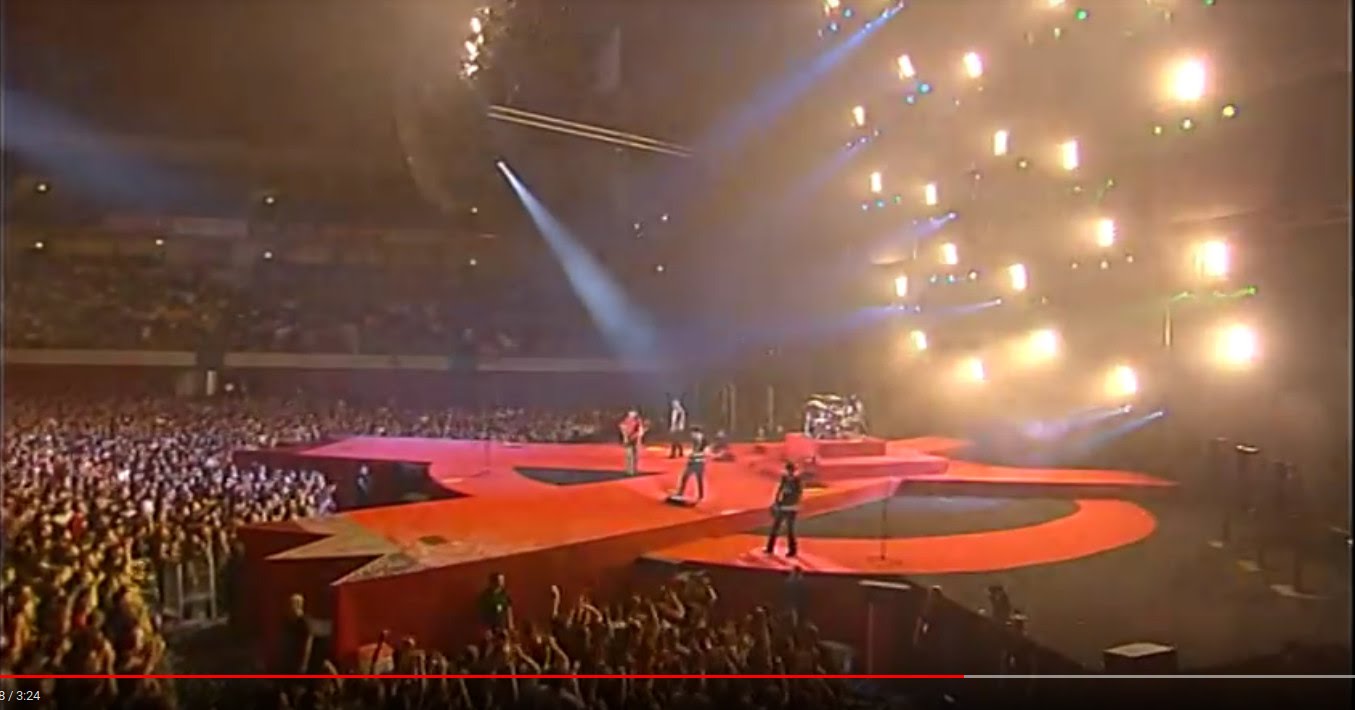
A remarkable concert I went to was the one that ended their 25th anniversary tour. The stage had a fabulous ‘X’ shape:

Xutos&Pontapés – XXV year tour

This photo was taken more or less from the same spot where I was.

So this is going to be my crazy project for the next months: a LEGO rock concert that pays tribute to the greatest portuguese rock band ever.

Of course, this isn’t a static LEGO project. Will try to use some of the gadgets and tricks I’ve been using those last 3 years since I joined PLUG.

From the first version I will certainly keep the animated minifigures and the stage lights (but the lights will be pure LEGO now… as much as I like the 1-wire lights concept, soldering and wiring was a mess and this is a purely for-fun project, no need for more stress).

So MINDSTORMS EV3 running ev3dev is expected, probably with one of the new Power Functions 2 devices. And of course at least one Raspberry Pi and a NodeMCU or other Arduino-like board. And webcams, displays, sound speakers, perhaps some special effects… we’ll see.

Site certificate

Been lazy lately.

Things got weird with oldest kid and all family is under stress. Perhaps even burnout. So programming and other things that require focus are getting delayed, mostly on purpose.

But today I finally took the chance to add a free certificate to my web server. So this blog is now encrypted. Let’s hope I didn’t brake anything…