
- Work in progress: LEGO Rock Concert
- The stage
- Stage Lighting
- Video Wall
- Rock Concert IoT
So last days I’ve been assembling the stage surroundings, a truss-based structure to support the left and right video walls and also the self-powered speakers:

I gave up hiding the speakers under/inside the stage. I know, speakers aren’t LEGO but I think they look good enough this way.
Also I have been testing the Raspberry Pi Zero W with the PiTFT and a local USB webcam. I use ‘VLC’ to stream the webcam video to the wireless network and can show a stream on the PiTFT with ‘mplayer’. And since mosquitto-clients package is also available for Raspbian I got a way to control everything with just a bash script with MQTT.
So this is the IoT setup now:
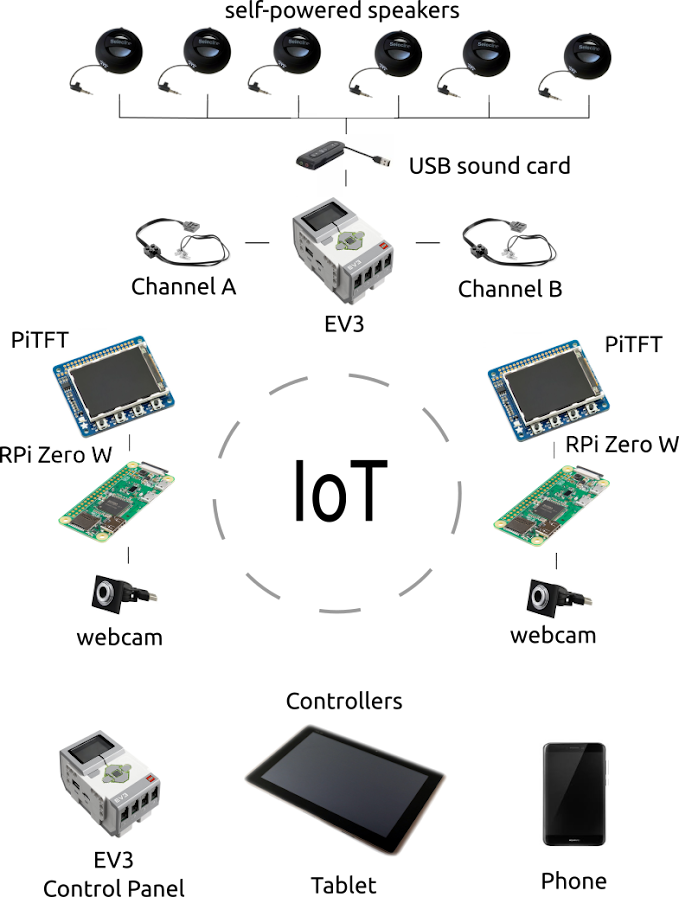
From any mosquitto publisher I can select which stream to show on each video wall and also start a bash script on the EV3 with the sound card and the LEGO Power Function lights so a music plays while the lights blink.
Only problems till now:
- ‘mplayer’ takes 5 seconds to start playing the stream, doesn’t seem to be a problem with the raspberry nor with the stream, just some kind of warm-up from mplayer, if I can’t fix it will have to find another video player that works with the PiTFT (it’s framebuffer, not X-based)
- a small USB endoscope camera I was considering using has some problems to show up on first boot of the Rasberry Pi so I will probably use another webcam, bigger but more reliable
While testing the IoT I used my Ubuntu laptop (‘mosquitto-pub’ and ‘mosquitto-sub’) but found a MQTT Dashboard App that works fine both on my Android 5.0 Phone and my Android 4.0 tablet. But I also wanted to use an EV3 as a controller so I tested a few bash scripts with the local keys but found it too limited… so decided to make a better control panel:
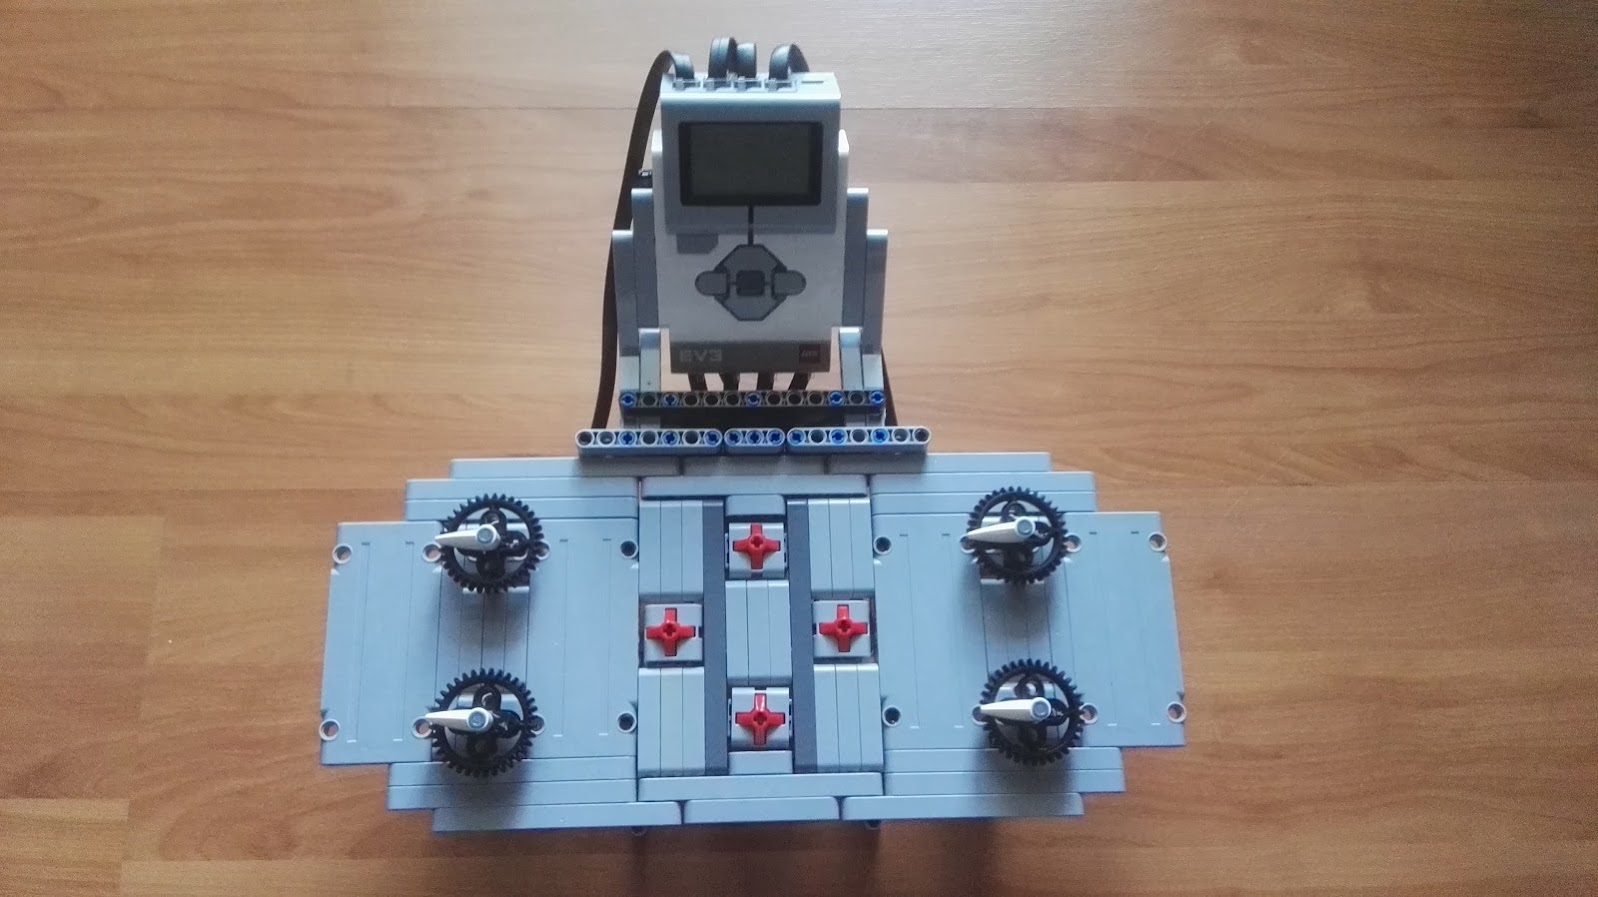
The four medium motors are used as selectors, I divided a whole rotation in 8 intervals (45º each) to have 8 options on each motor. So it works like this:
– one selector for Video Wall #1
– one selector for Video Wall #2
– one selector for Sound and Lights
– one selector for Special Effects
I can choose what stream I want to show on each video wall and start playing a music. Later I will add more options (photo presentation, youtube video…) and use the 4 EV3 touch sensors to adjust parameters for each option (like the brightness, the frequency or the effect of the lights, the volume of the sound, forward/backward while showing some presentation…).
A video explaining this:
I speak in english but my voice is weak and I had an allergic caugh in the middle so I added sub-titles (also in english).